1. Set up the Wi-Fi settings
Press the [MENU] button to open the menu, switch tabs and select [Network settings].

Select [Enable].

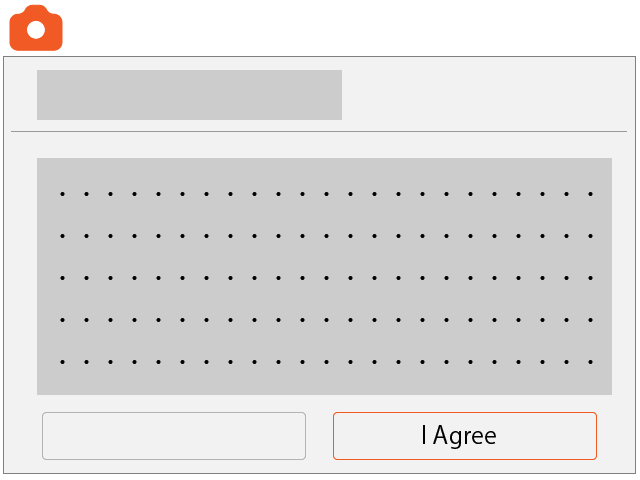
2. Select [Upload to Web service].

Select [Agree]
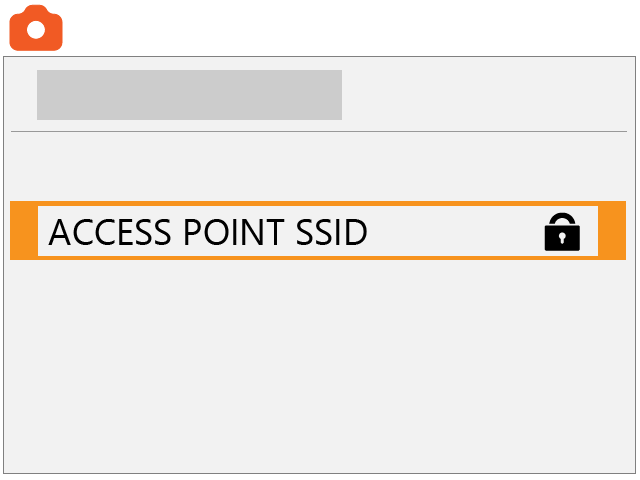
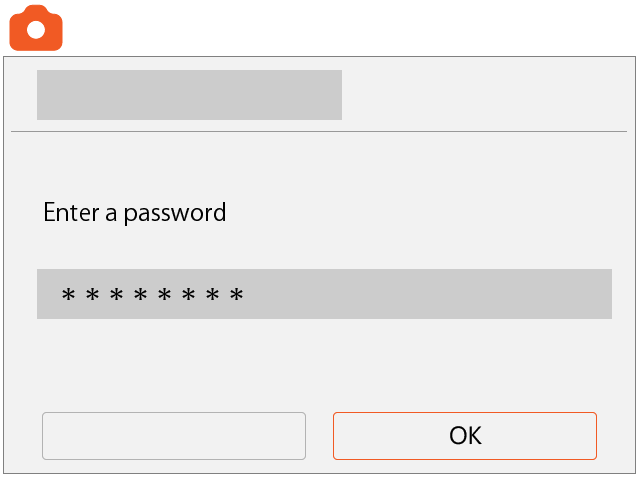
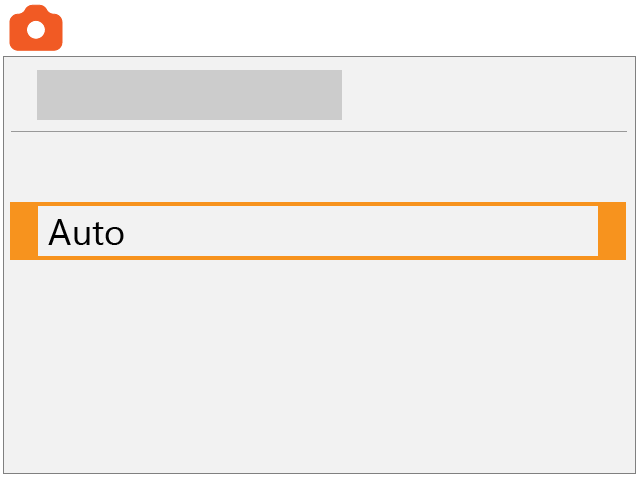
3. Connect to a Wi-Fi access point
Select [New settings].

Select an access point.
Enter the password for the access point.
Select [Auto].
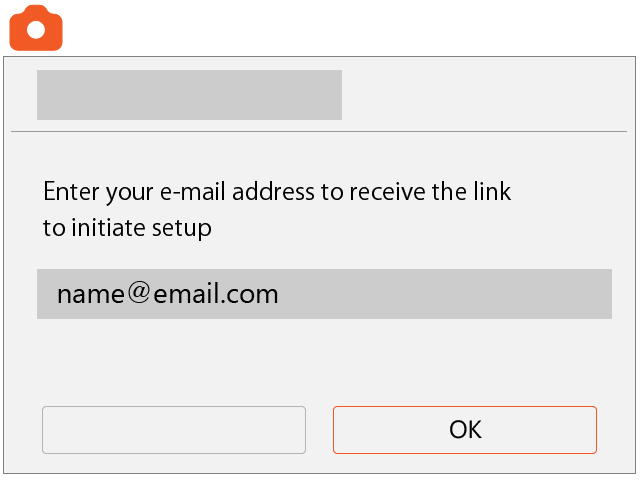
4. Entering an e-mail address
Enter the e-mail address associated with the Canon ID. If you do not have a Canon ID account, enter an email address for registration.
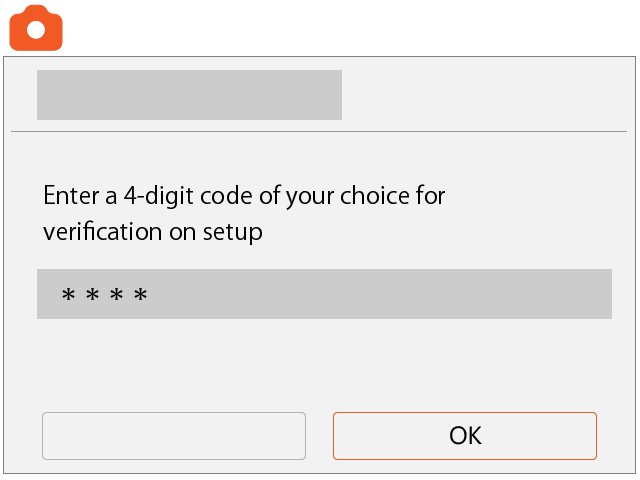
5. Entering the 4-digit number
Enter any 4-digit number you want and select [OK]. The number you enter will be required for Step 7.
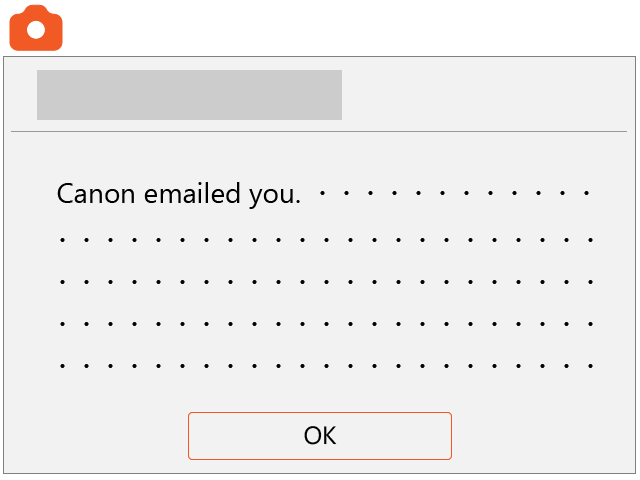
Check the displayed message, and click [OK].
The
 icon will change to
 .
.

6. Receiving the notification email
A notification email will be sent to the email address you entered in Step 4. Access the URL contained in the email.
7. Entering the 4-digit number
Enter the 4-digit number you entered in Step 5.
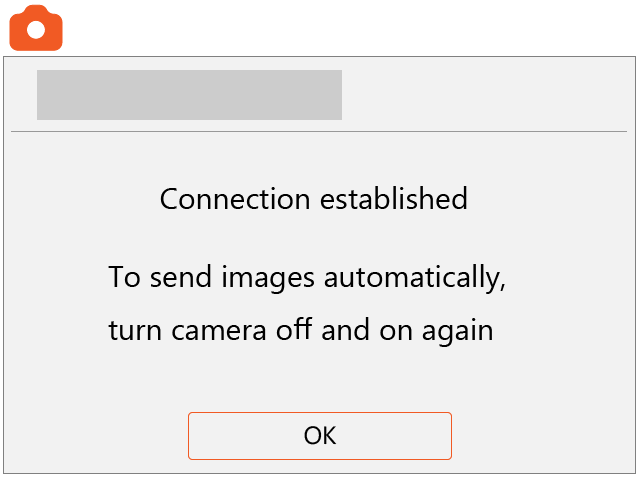
8. Completing the camera connection
Select [Upload to Web service].
Select [OK].
The icon changes to
 .
.

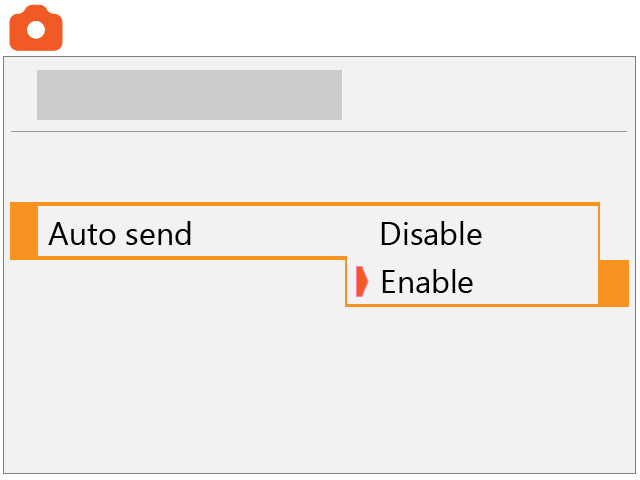
9. Set up automatic sending
Select [Upload to Web service].
Set [Auto send] to [Enable].
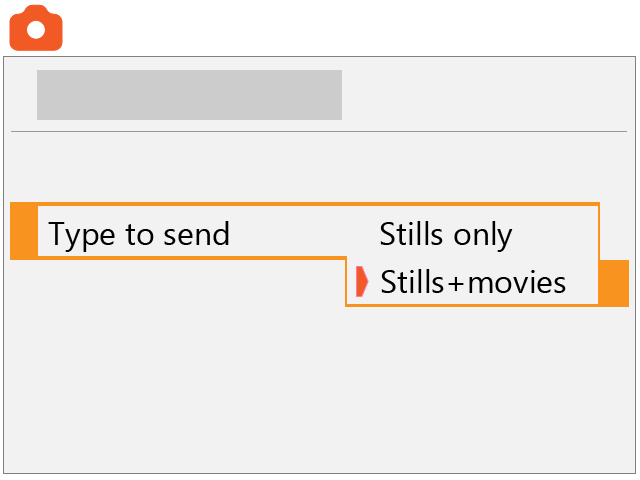
10. Select [Type to send].
Set to [Stills only] or [Stills+movies].
11. Restart the camera.
The images are now sent automatically.