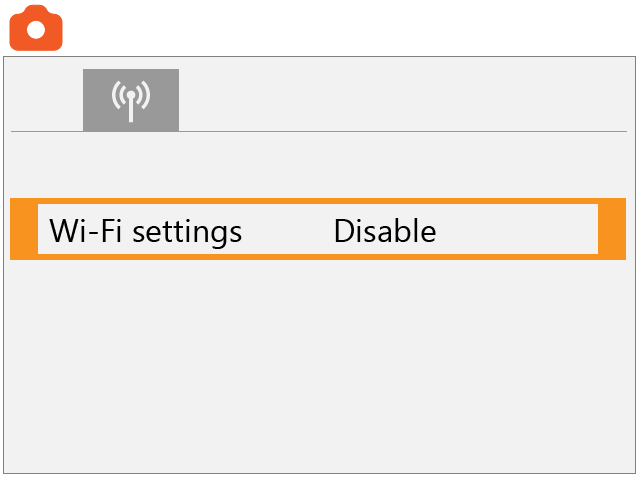
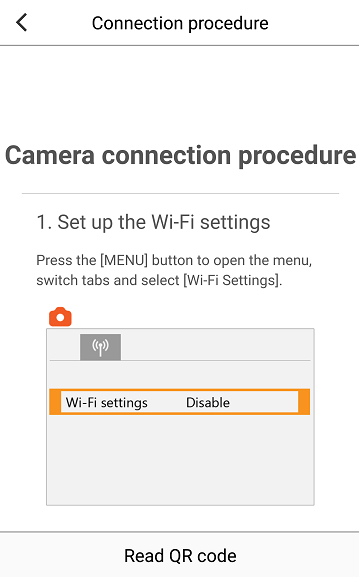
1. Set up the Wi-Fi settings
Press the [MENU] button to open the menu, switch tabs and select [Wi-Fi Settings].
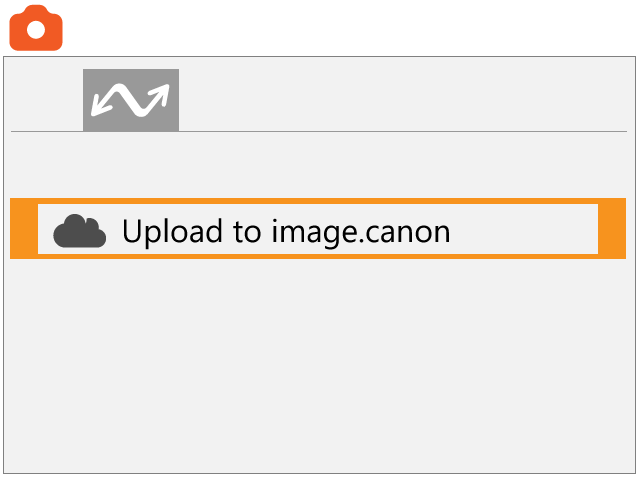
Press the [MENU] button to open the menu, switch tabs and select [Upload to image.canon].
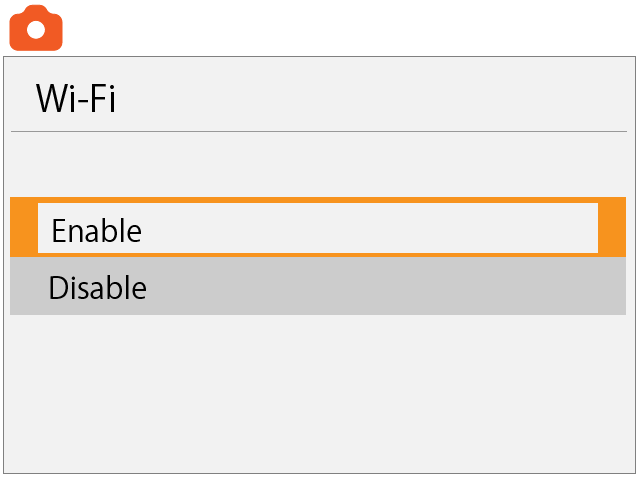
Select [Enable].
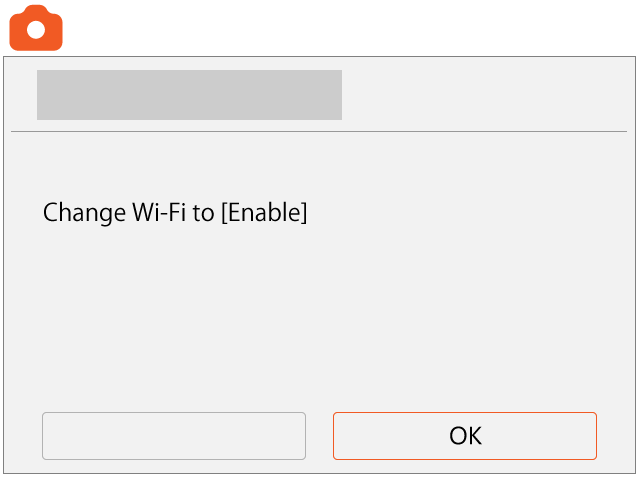
Select [OK].
2. Display a QR code
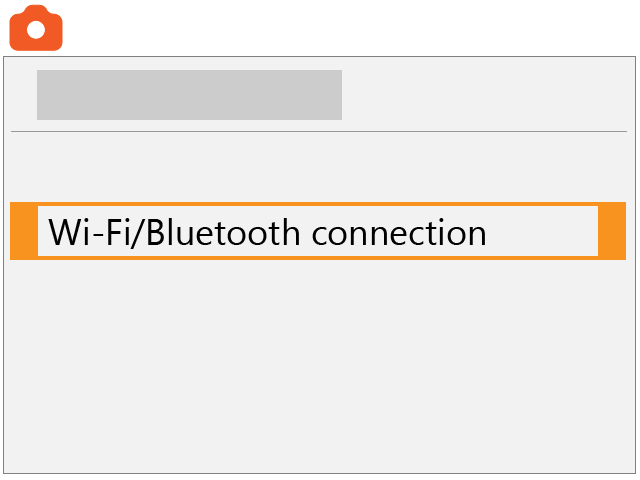
Select [Wi-Fi/Bluetooth connection].
Select the
 icon. If the
button is not displayed, use the
icon. If the
button is not displayed, use the
 button to switch between screens.
button to switch between screens.

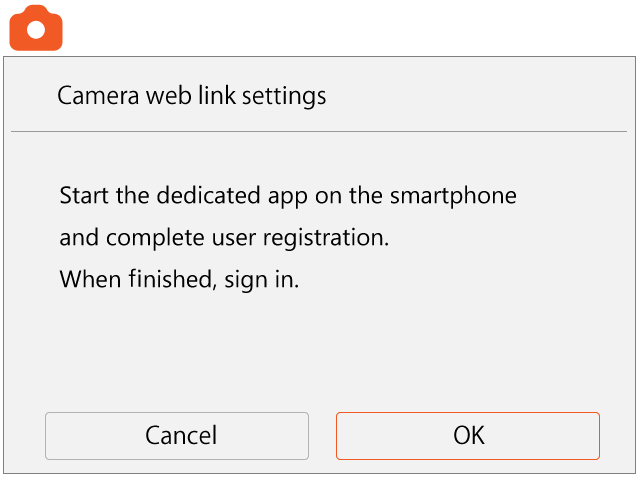
Select [Connect].

Select [OK].
A QR code for connection is displayed.

3. Read the QR code
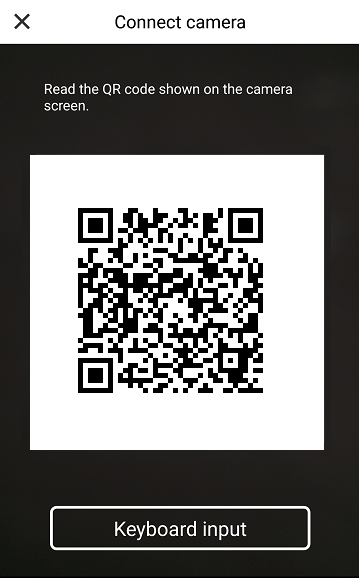
Tap [Read QR code] at the bottom of the connection guide screen in the image.canon app. If you're using a browser, click [Keyboard input] at the bottom of the screen.
The app switches to the QR code reading mode. Read the QR code on the camera screen. If you're using a browser, enter numbers displayed on the camera screen and click the [Send] button.
The app screen switches to the following.
Leave the app screen as it is and proceed the following operation.
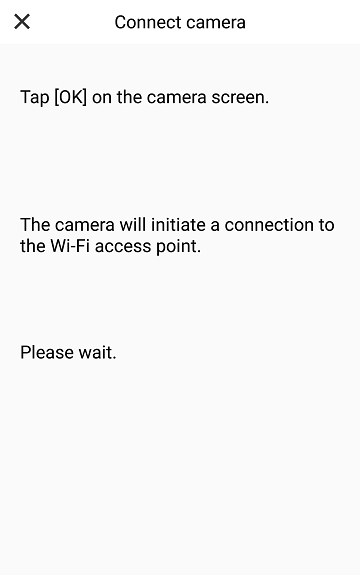
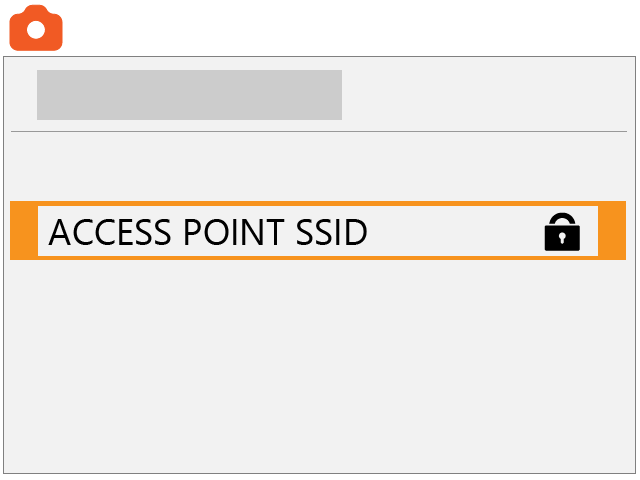
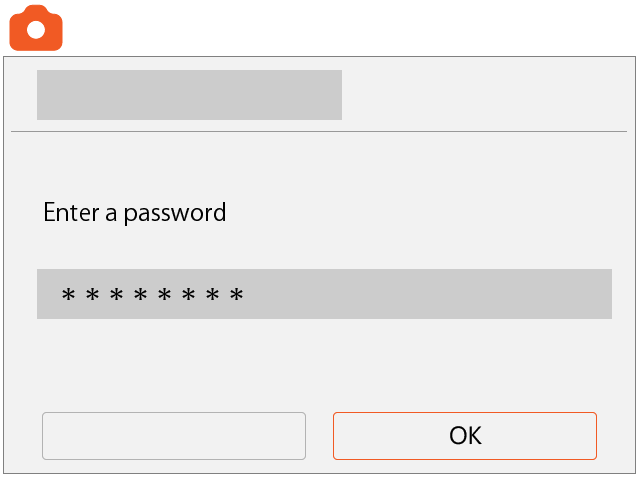
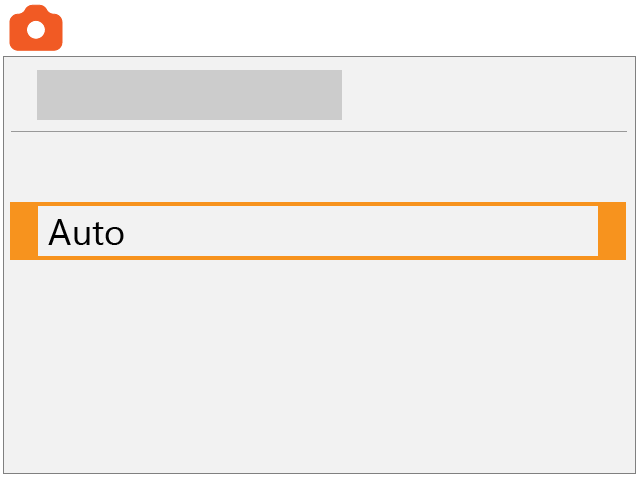
4. Connect to a Wi-Fi access point
Click [OK] on the camera screen.
Select an access point.
Enter the password for the access point.
Select [Auto].
5. Check the connection information
The camera serial number appears on the screen.
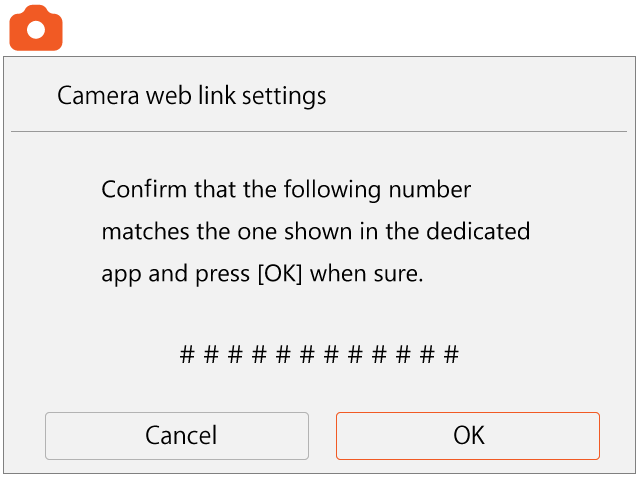
The app screen changes. Make sure the information on the screen matches the product name and serial number of the connected camera.
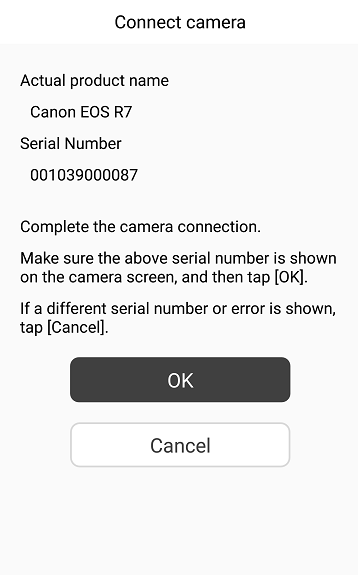
If the information matches, select [OK] on the camera screen.
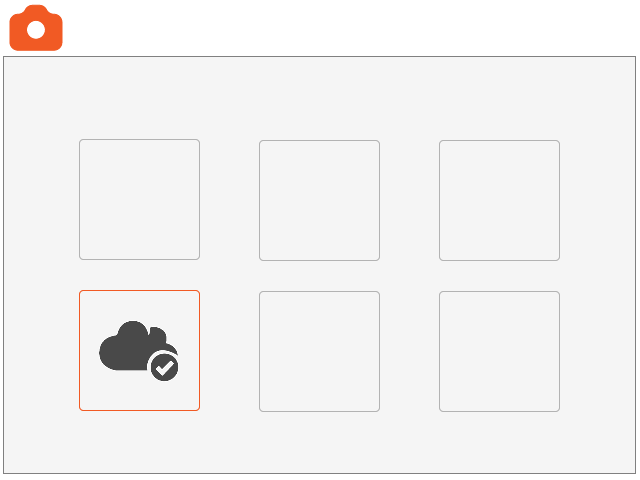
The icon changes to
 .
.
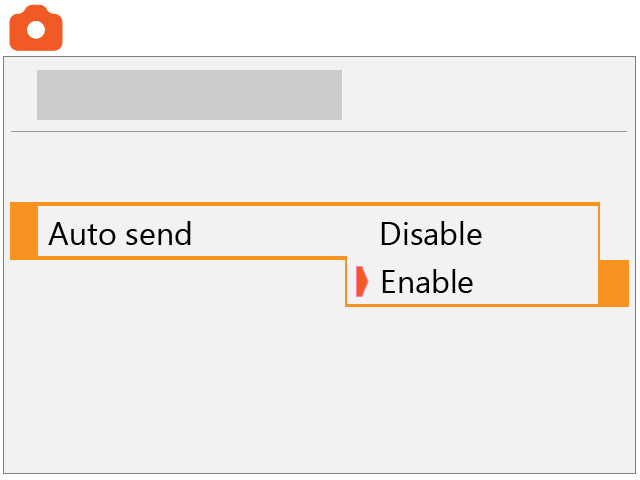
6. Set up automatic sending
Select
.
Set [Auto send] to [Enable].
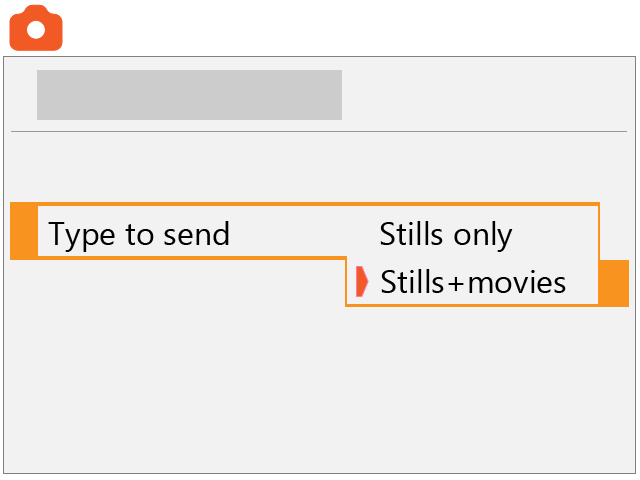
7. Select [Type to send].
Set to [Stills only] or [Stills+movies].
8. Restart the camera.
The images are now sent automatically.