Select region and language
Tips for Using Vol.7

Automatically sort by face focus and whether eyes are closed—and automate transfers to Lightroom too!
A powerful ally for model shoots.
Capture the best moment without missing a beat.
Model shoots, where photographers and models create a work together, are exceptional—both for the fun of the process and the sense of achievement when you get the perfect shot. And the joy of developing RAW data and meticulously editing brightness and color to create your work is just as special.
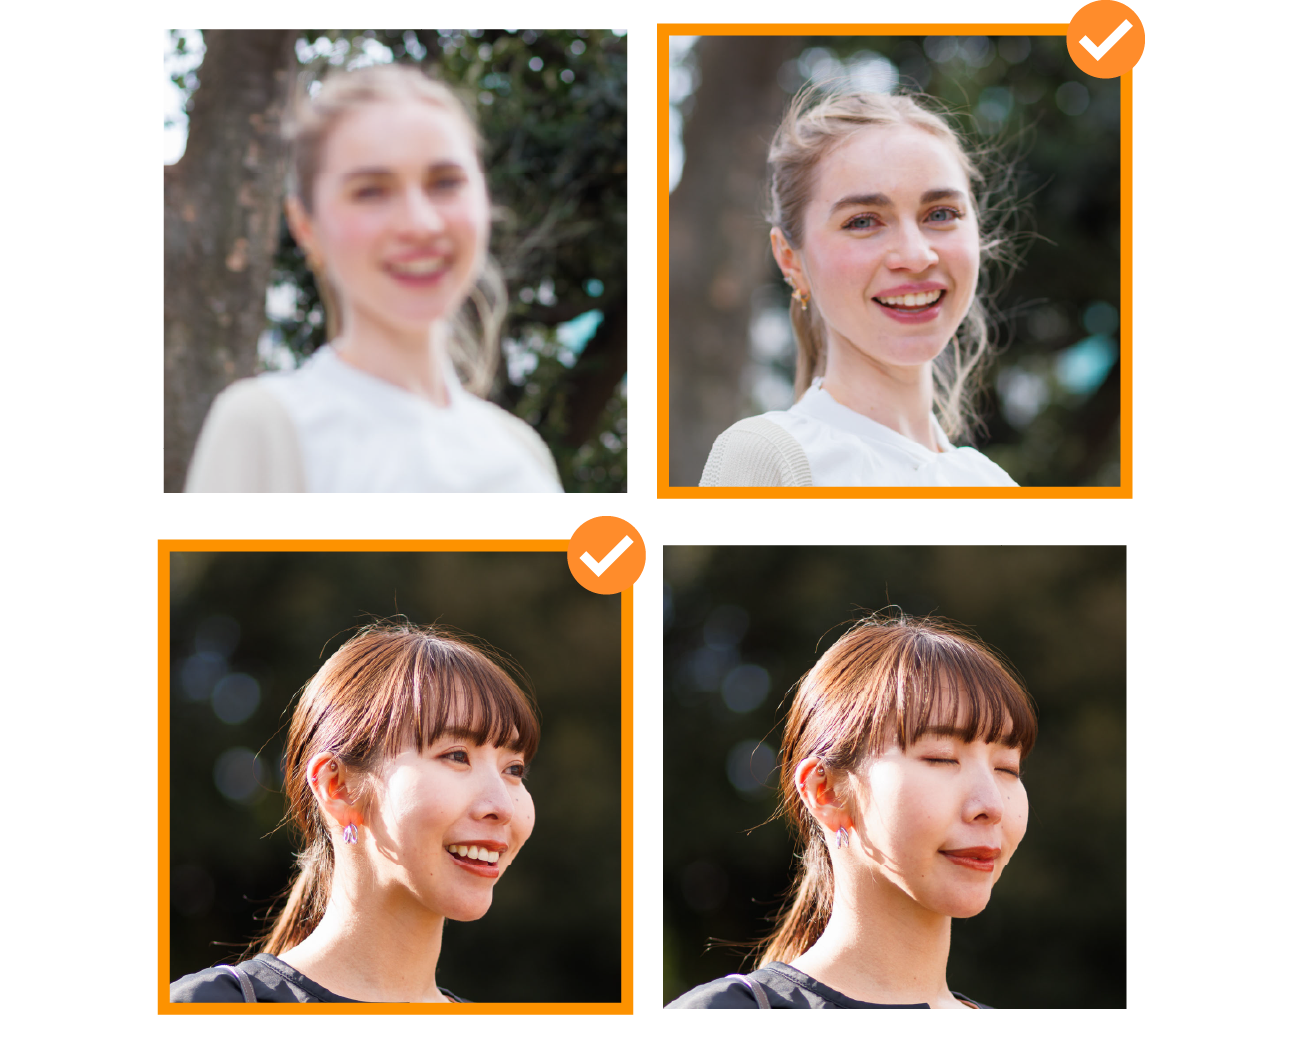
By combining image.canon’s still-image sorting features with cloud-service transfers, you can automatically extract and transfer photos—with eyes open or with the face in focus—from the vast amount of data uploaded from Canon cameras.
How to use
You can reflect your preferences in the settings
First, narrow down by facial expressions and focus.
You can also customize by combining many more items.
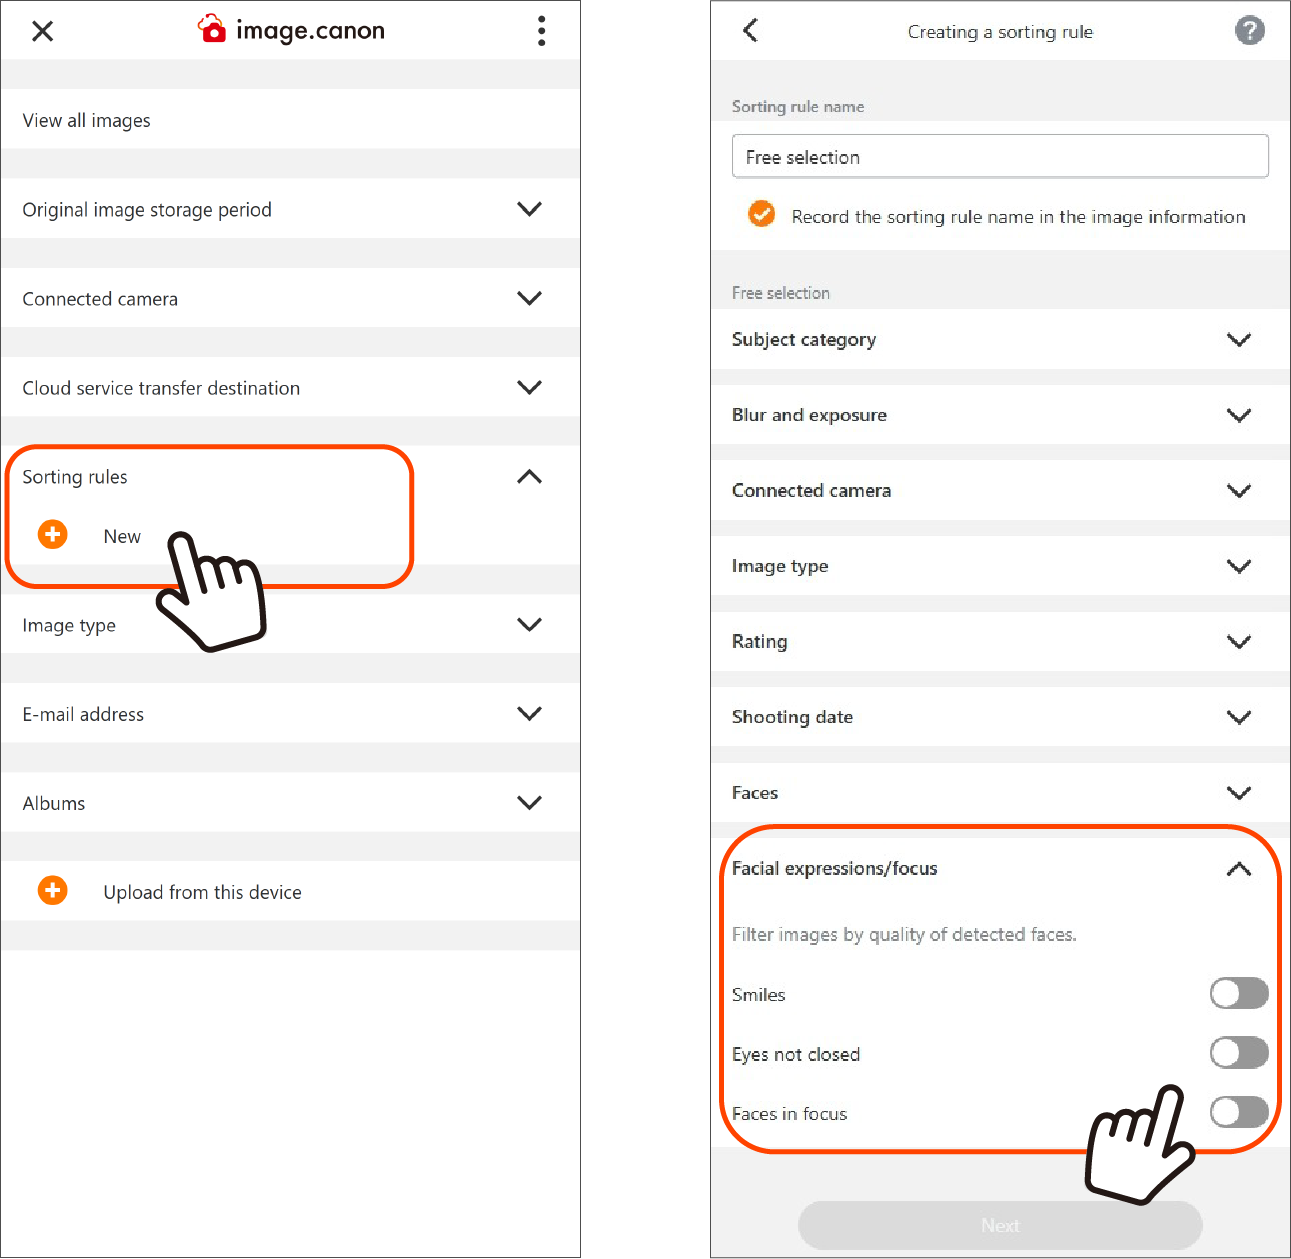
1. On the main menu screen, press the New button for [Sorting rules] to go to the sorting rule creation screen.
2. On the sorting rule creation screen, press the [Custom] button and specify the rules.
※ If you give the sorting rule an easy-to-understand name, it will be easier to find later.
3. Select [Facial expressions/focus], turn ON the toggle buttons for [Smiles], [Eyes not closed], and [Faces in focus], then press the [Next] button.
※ On this screen, you can narrow down data using various items such as image type and Blur/exposure evaluation.
4. On the sorting rule confirmation screen, review the details and register with [Complete].
The next step is to set up the connection between image.canon and Adobe Lightroom.
Step 1. Connect to your Adobe account
Step 2. Apply sorting rules

You can also set up Adobe account login and grant image.canon access within the app.
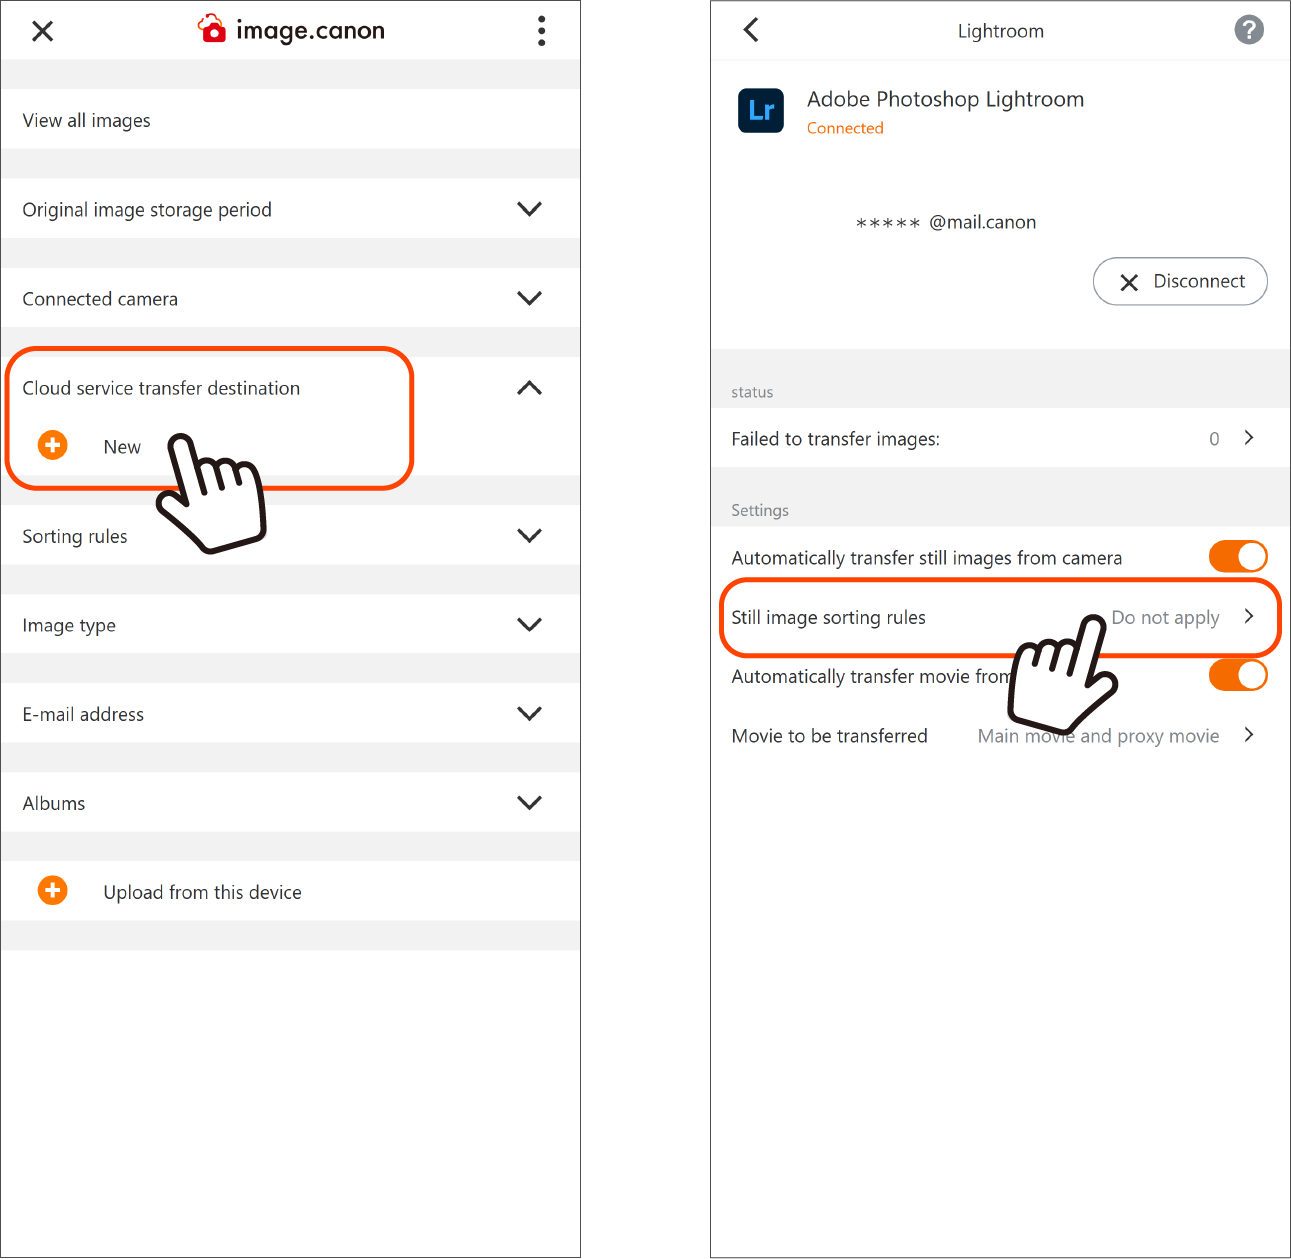
1. On the main menu screen, press the New button for [Cloud service transfer destination] to go to the service connection menu screen.
2. From the list, select the service to connect (Adobe Photoshop Lightroom) and open the settings screen.
3. Press the [Connect] button to open Adobe’s sign-in screen.
4. Sign in and allow image.canon access.
※ If you are not subscribed to the required plan, an email about Adobe plan subscription procedures will be sent to the email address of your Canon ID.
5. After setup, Adobe Photoshop Lightroom will appear under the Cloud service transfer destination on the main menu screen. Press the [i] button to the right of the name to go to the settings screen.
6. You can configure auto transfer on/off and applying Sorting rules.